
Add a key switch lock so your kid can’t turn it on or off
I childproofed my wife’s computer because she was tired of our little daughter turning it off while she was working. It’s cute once or twice but when your kid starts pushing that on/off button it’s time to mod the computer.

A computer on/off switch is not like a wall light switch that stays in “on” position when actuated. It’s spring loaded like a door bell switch and close the circuit only for as long as you’re holding it down. I could not find a spring loaded, key actuated switch at the local store. Instead I bought a Philmore key switch [Fig. 1] and connected it in series with my existing computer on/off button.
The new key switch acts as a master computer switch. When it’s in the off position the existing switch can’t turn the computer on or off. When the key switch is it’s in the on position the existing switch works as designed. When the computer is on I can set the new key switch to off position and my daughter can’t power it down by pressing the on/off button.
The following photos illustrate how I put the switch in although you will likely have to modify the steps to make this hack work with your computer. The process should not take more than a couple of hours. You will need basic tools and supplies like an electric drill with a large diameter hole cutter or a jigsaw, insulated copper wire, soldering iron and electrical tape.
Illustrated Computer Childproofing Steps

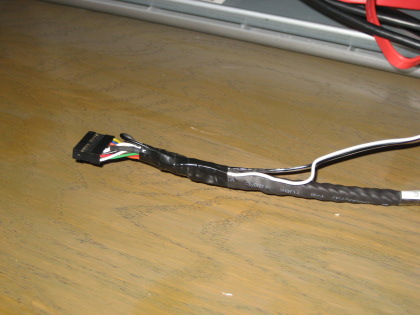
Disconnect the AC power cable from the back of the computer. Remove the side and the front face. The on/off button has 2 white wires connected to it. The color of your wires may be different.
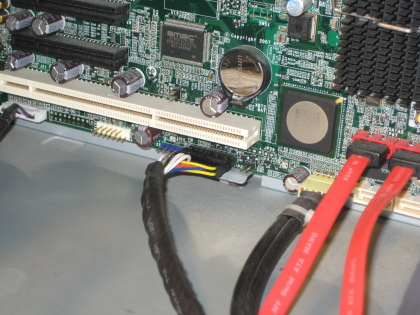
The white wires from the on/off button are part of the black bundle of wires. They are connected to the motherboard with a wide multipin connector. Disconnect this connector.
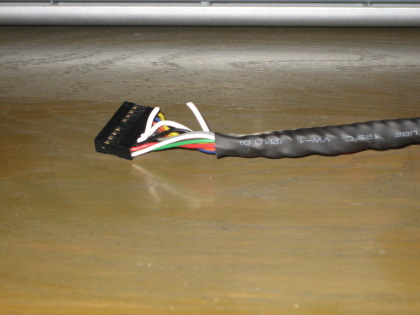
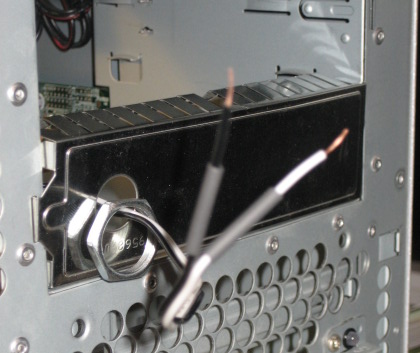
Cut either of the wires from the on/off switch.
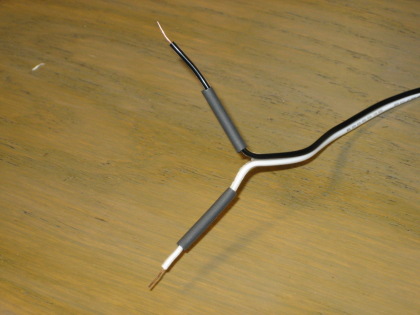
Cut a piece of spare double wire long enough to reach the computer front. Strip the tips. Note the shrink tubing on the wires. I like shrink tubing better than electrical tape for the final insulation but you can also use electrical tape.
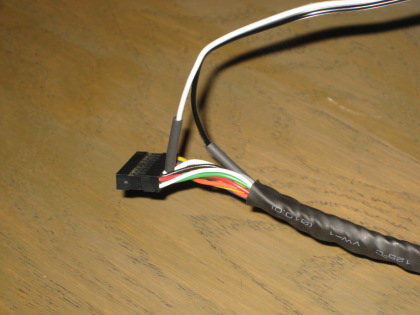
Soldier the wires to the cut wires.
Wrap some electrical tape to secure the wires and keep them away from fans and other components.
Bring the wires to the front of the case. Strip the insulation, thread shrink tubing if you’re using it and don’t forget to thread the switch nut before you solder the wires to the switch. Go ahead and solder the wires to the switch.
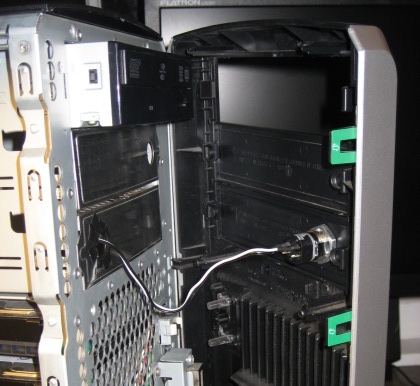
Everything is in place. You can test your work now or if you trust your skills just tighten the switch nut and close up the computer.

All done. This computer is childoproof and immune to kids pushing the on/off button. Just hide the keys well.