
Repeater working slow? Overcome diversity.
One of the most practical uses for WRT54G wireless router in repeater mode is to redistribute distant gateway’s internet connection. The distant AP can in some cases be several kilometers away. You can attach a high gain directional antenna [LINK] to one of the WRT54G’s antenna ports to connect to a distant access point. In this setup the second Linksys stock antenna is used to provide local connectivity [Fig. 1].
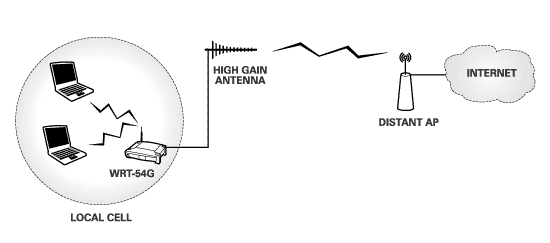
The problem with the above setup is that you may suffer significant radio connection issues. Linksys WRT54G is designed to work with two symmetrical antennas (same kind, relative proximity) in so-called “diversity” mode. Attaching unequal antennas which cover different radio cells as in Fig. 1 is something diversity mode is generally not equipped to deal with.
What is this diversity mode? Linksys antennas are never both on at the same time. Diversity circuitry determines which antenna has better reception and switches it on in a fraction of a second while it turns off the other antenna. This complex behavior is necessary to overcome a radio phenomenon known as multipath distortion. I recommend a very good white paper by Cisco which explains multipath distortion and diversity in a very plain language.
Obviously diversity is designed with the idea that both antennas will be used in the same radio cell. Separating the antennas or using antennas of unequal gain inevitably causes one of the antennas to be favored by diversity circuitry which leaves the other antenna in the dark. The reality is not as black and white. It is not likely that you will experience a complete shutdown of one of the antennas but favoring one antenna will cause interrupted communication on the other antenna.
You can test how much service interruption you are getting. Connect to the repeater wirelessly and measure the internet upload and download speed. Repeat the measurement three times and take a note of the average speed. Then connect to one of the WRT54G LAN ports with an ethernet cable and take the same measurement. Compare the averages to see how much speed you’re losing because of diversity.
A simple way to overcome this problem is to disable the stock antenna and connect to the repeater through wired LAN connection only. Third party firmware like DD-WRT allow you to do just that.
A more effective solution albeit a more expensive one is to use two routers [Fig. 2]. The Linksys WRT-54G still works as a repeater station with the stock antenna disabled. A second router is connected to WRT54G through ethernet. I have chosen the Buffalo WHR-G125 for the second router because it generally outperforms WRT54G straight out of the box.
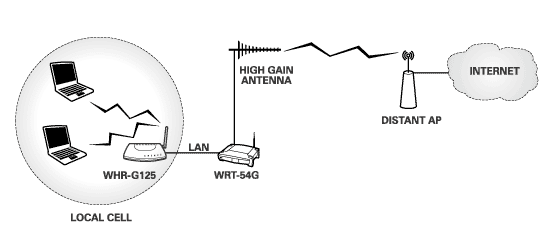
In this scenario the Linksys still works the same way repeating the distant access point. The second router WHR-G125 redistributes the signal locally. It also works as a switch so you can hard wire any local computers into the three available LAN ports (you can also hard wire into the WRT54G’s LAN ports).
You may ask why all the extra labor turning off the local antenna and connecting the second router. Why don’t we just use a router that doesn’t use diversity in the first place. Well, any router without diversity will have a single antenna by definition. It is perfectly fine to use such router with the stock or even a replacement high gain antenna. The problem is that if you are attempting to repeat an AP that is far away you will need a parabolic antenna [LINK] or a yagi. The radiation pattern of these antennas is concentrated in the front. In other words, they will connect to the distant AP just fine but may not leave a lot of useful signal behind them and your local radio cell will have unreliable coverage. This will cause your local WiFi connection to drop out frequently.
This example uses DD-WRT firmware which is available for both WRT54G and WHR-G125. Connect the two routers with a LAN cable and connect your computer to the second router with another LAN cable. You can also set up the router while connecting wirelessly but it is a bit more difficult. Unless you have just uploaded the firmware start clean by resetting to factory defaults. The factory reset is under “Administration” tab.
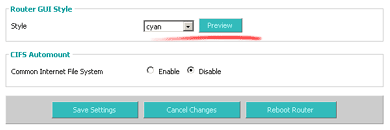
It is very helpful to change the GUI colors on one of the routers so you can always know which control panel you are logged into. You will find the color control settings under “Administration” tab as well [Fig. 3].
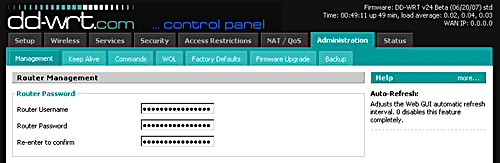
Change the user name and password and take a note of them for later use [Fig. 4]. The default DD-WRT user name is “root” and password is “admin”
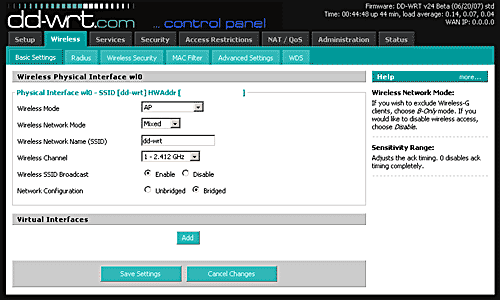
You should pick a non-overlapping channel frequency for better performance [Fig. 5]. Channels 1, 6 and 11 do not overlap with each other in the United States. For example, if your repeater is broadcasting on channel 7 you can select either channel 1 or 11 on the second router. Everything will work even without proper channel assignments. This is just a precaution to avoid interference.
Also type in the SSID. This is the name you will see when connecting to the router wirelessly. It should be different from the SSID of the repeater.
The last and the most important step is to go to the “Setup” tab [Fig 6]. Under “Basic Setup” we’ll change the “Local IP Address” to place the second router in the repeater’s subnet. In this case the repeater IP is 10.0.0.1 so I changed the IP address on the second router to 10.0.0.120. The last place number (120) can be any number smaller than 255 and other than 0 or 1.
Select “Disable” under “DHCP Server” on the same page.
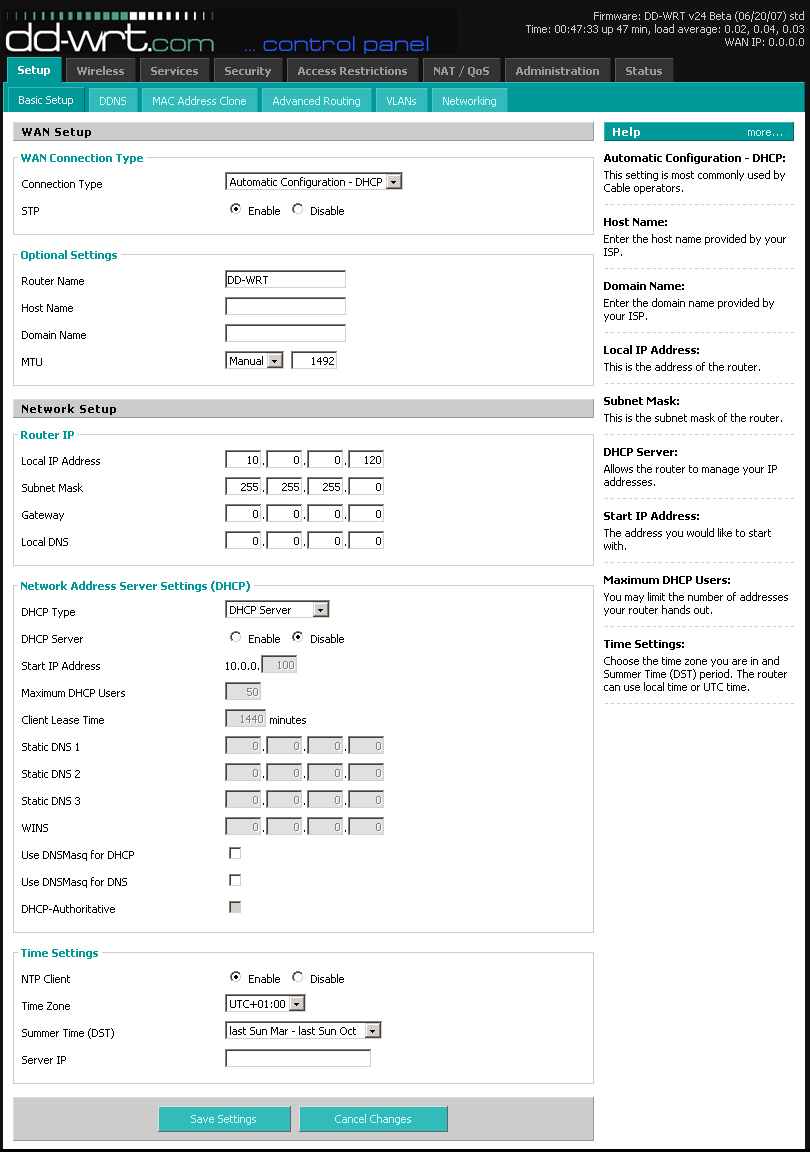
At this point you are ready to connect to the internet as long as the repeater is working properly. The LAN ports on the WHR-G125 and the wireless connection are both available for use at this time. You can still access control panels for each router by entering their respective IP addresses into a browser. In this case 10.0.0.1 takes you to the repeater’s GUI and 10.0.0.120 takes you to the Buffalo router.
This is a brilliant write up. Espically hihglighting the issues of using a domestic router with high gain antennas.
I doubt many people know about multi-path distortion, i certainly didn’t and this explains it very well and how to overcome it. Nice work!
However if one antenna is receiving and the other transmitting does multipath distortion still apply?
Is there anyway to fix which antenna is Rx and which is Tx?
It’s been very long time since I have powered up my WRT54G router. There may be the Rx/Tx selection per antenna in the old builds of DDWRT. I can’t remember. There is certainly no such control in the stock Linksys firmware.