Ditch the AC Adaptor and Use the Sun
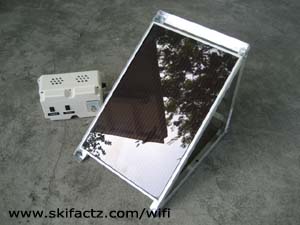
Solar panels are becoming so common that I got mine at a swap meet. It’s new and it cost me about $40 U.S. My Linksys WRT54GL is off the grid now [Fig. 1]. If I can do it so can you.

The first thing to consider is that you will not be able to plug the router directly into the solar panel. I will name just a few obvious reasons:
- When the sun goes down it pulls the plug. No daylight, no power.
- The panel may have insufficient power output to run WRT54G series routers directly.
To overcome these issues I connected the router to a 12V battery and connected the battery to the solar panel. The panel provides a trickle charge. I don’t use this router every day so the battery has time to recharge.
WRT54GL draws about 240mA of current at 12V. Power is calculated by multiplying the current by voltage. Hence 0.24A X 12V = 2.88W. Note that 240mA equals 0.24A.
Unless you’re cheap like me you should purchase a panel from a reputable distributor. They will provide you with technical specifications. Luckily, photovoltaic panel output is often expressed in Watts so you can correlate that number to the 2.88W value of your router. Any panel more powerful than 2.88W should be capable to power up WRT54G. In reality that depends on the conditions outside of your control like cloud coverage for example.

This wiring diagram should do the trick [Fig. 2]. I decided to install a switch for the solar panel to prevent overcharging the battery. Let’s say I win a 3-month tropical cruise raffle and go away with the router powered off. The battery could possibly overcharge. Overcharging a lead acid battery can cause battery damage and in rare cases can make the battery explode!
The panel switch disconnects the battery from the solar panel while you’re away. The second switch powers up the router.
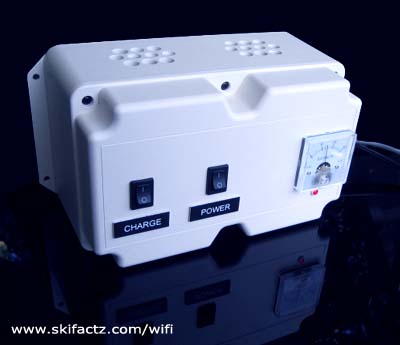
I added a LED power indicator and a Voltmeter [Fig. 3] but they are not indicated in the schematics for simplicity and cost.
Note that there is also a fuse [Fig. 2]. You should at least use a fuse rated for 500mA DC.

Lead acid batteries are fairly safe but can explode and cause a fire. A fuse is a good safety device but there is always an inherent danger of fire and explosion associated with lead acid batteries and DC power. A short circuited battery can create very high current. High enough to melt your eyeballs out of the sockets.
On top of that lead acid batteries must always be charged in a well ventilated area. Even sealed batteries can have cracks that allow hydrogen gas to leak. Hydrogen plus electrical switch arcing is an explosive combination. Remember that newsreel film of Hindenburg coming down in flames? That aircraft was filled with hydrogen.
The Solar Panel Support
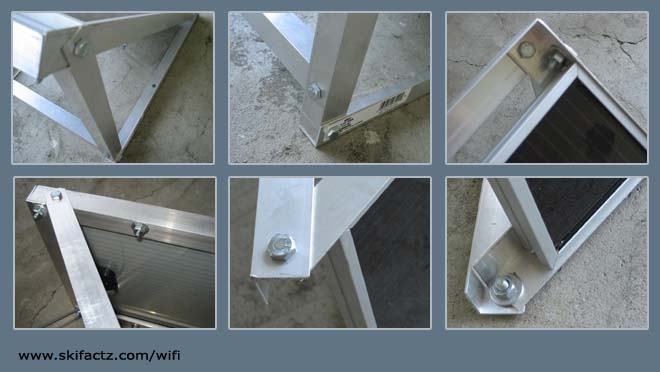
See the photos of aluminum frame I built for my panel [Fig 4]. Take them as a rough guide only. You may have different materials at hand or your panel may be constructed differently than mine. I drilled two holes in the legs of the frame so I can drive screws into a flat roof. Any time you screw something into the roof you’ll need silicon sealant to prevent water leaks.

Generally, the panel should be set at 45 degrees and oriented towards the sun. Avoid areas where there may be shadows that move as the day progresses. If your area is clear of shadows in the summer, the winter may be a whole another story.
If you live in an area that receives lots of rain consider sealing all electrical contact boxes on the panel with silicon to block moisture from short circuiting the panel. Excessive snowfall can bury your panel for a while and cut off the battery from daily power supply.
Use a good thick copper wire to connect the panel to the battery. As I have already mentioned, during a short circuit batteries can create quick and powerful current spikes that will melt wires. The fuse should take the beating but play it safe with something like AWG 17 (1.15mm) or thicker. There are also considerations for proper wire gauge that take into account wire length, voltage and current. There are plenty of places online that provide formulas and information on wire selection.
Battery Enclosure
A couple of rules apply. Good ventilation is a must. You should have vent holes on top of the enclosure [Fig 3]. Hydrogen is lighter than air and will collect at the top of your box if there is a leak.
Metal enclosure is probably not the best idea. You could short circuit the battery if you touch the metal with the wire terminals. Short circuiting a 12V battery can cause premature death.
Mount your battery enclosure in a dry area.
This place has a great selection of equipment enclosures – http://www.polycase.com/.
Battery
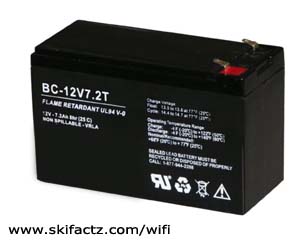
I got mine at the swap meet [Fig. 5]. Three used 12V 7Ah batteries for $5 U.S. Not a bad deal. If you are buying used look for cracks in the plastic. Explosive gas may leak through the cracks (although there may be cracks that you can’t even spot with a naked eye). A new battery is a better and safer choice.

You can get fancy and connect several batteries in parallel to increase capacity. This is done by connecting any number of batteries’ positive to positive leads and negative to negative leads. Just remember that this should be done with new batteries only. Otherwise you are reducing the used battery lifespan.
A single 7Ah battery should be enough to run your WRT54G for 29 hours.
You could use an old car battery. The only disadvantage is that some car batteries are not sealed. The acid can spill and they may require maintenance. Car batteries are also larger than the model shown in Fig. 5 and impractical for placing inside an enclosure. However, even a single car battery will make your router run for many, many days.
Odds and Ends
Make sure your switches are rated for at least 12V DC. Insulate all metal points of contact with either good quality electrical tape that will not unwind in heat or better yet with tube heat shrink.
You can buy a premade DC cord with a plug that fits your router or you can get one from an old power supply. Make sure that the plug fits snuggly. Some cylindrical connectors seem to plug in well but are not thick enough and will drive you nuts when you jiggle the cord and reset the router.
Closing Thoughts
Is this project worth the effort? Probably not. You will spend more money than what you’d pay for electricity for the life of your router.
However, there may be some practical reasons why you may want to build a solar power supply. If you live in emergency prone areas where loss of power is common this solar powered router may come in handy.
If you’re a green freak you’ll love it (I hate to mention that manufacture of all the pieces hardware you’re about to use also contributes to CO2 emissions).
Most importantly, if you’re dealing with mid-life crisis like me this is a great little project to keep you busy for a week or two. The wife won’t mind either.

I have solar panels does it need wifi for it to work
Yes. Solar power is dependent on wifi, not the sun, as previously believed.