
Protect Your Outdoors Antenna
Two types of damage can affect a working antenna.
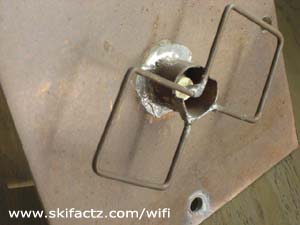
It can sustain physical impact and the copper wire may bend and break the soldiered point.
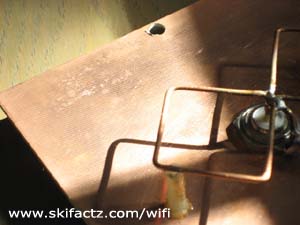
If exposed to rain the copper will oxidize which may eventually lead to decreased performance.
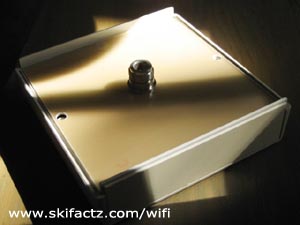
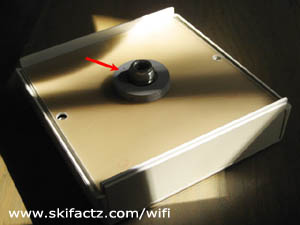
The antenna pictured in Fig. 1 was used outdoors for a month in almost no rain. The antenna on the right was used for the same amount of time in the same location but was enclosed. The difference is striking [Fig 2].
Both of these types of damage can be easily mitigated with proper antenna housing. You can use ready made electronics enclosures or even low end solutions like Tupperware containers. If you use Tupperware consider sealing it with silicon to prevent rain from getting in.
The enclosure can not be made of metal nor can have any metal foil decals on it. You must use a material that does not reflect microwaves.
Some materials may cause the signal strength to drop. You can conduct a simple test of microwave attenuation of your desired enclosure. Lock the antenna into a vise grip or a camera tripod and point it towards a distant access point. Connect the antenna to the computer and start Netstumbler. Run Netstumbler for several minutes. Then place the antenna housing in front of the biquad and observe the signal change in Netstumbler. If there is no change or change is rather small your box is acceptable as an antenna enclosure.
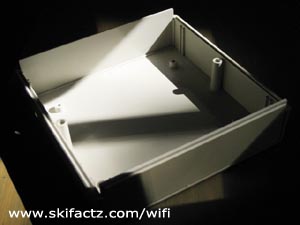
You can find equipment enclosures at electronics stores or mail order them. Polycase has a great selection of various enclosures and I used their products for other projects. The actual enclosure I used here is CM5-125 from Pactec. It’s a little tight for Martin’s biquad so I ended up belt sanding the edges of the PCB to make it fit in the box. The change of size does not seem to affect the antenna performance.
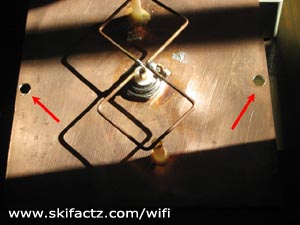
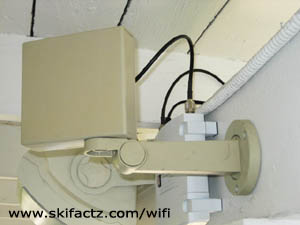
Drill small holes in the biquad PCB to match the hole configuration in the enclosure [Fig. 3]. Place the antenna face down into the enclosure [Fig 5]. Drill a center hole into the back of the enclosure so you can run the cable through it. I used a foamy ring from a 50 CD-R spindle as a gasket between the back of the antenna and the back of the enclosure [Fig. 6].
You will notice that the construction of the biquad pictured here differs slightly from Martin’s design but the same steps are valid for an antenna built exactly to his specifications.
|
|
|
|

|
|
I strongly recommend using heat shrink tubing to protect the antenna’s soldiered connections from being ripped apart. The LMR 400 cable is very rigid. Since it can not flex much it can not absorb physical abuse and your point of soldier may fail. Shrink tubing is a special type of material (you can find it at Radio Shack) which will shrink when exposed to heat generated by a heat gun or a gas torch.
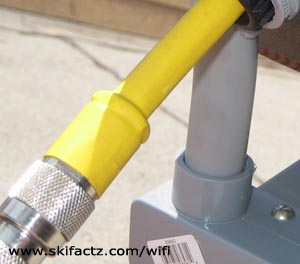
Prior to soldering your “N” connector, dress the cable and the copper pipe with heat shrink tubing.
Mount and solder the connector and then shrink the tubing so it wraps tightly over the pipe and the cable. The other piece should cover the connector and the cable right next to it.
If you don’t have a heat gun you can use the propane torch but have to be carefull not to burn the cable and the shrink wrap. Test it on a small area first.