You can spend upwards of $200 on a home Network Attached storage (NAS) or you can build one using spare parts like I did. Not only the DIY solution is cheaper, but it also allows you to customize the NAS to meet your needs.
It’s also a great way to learn how all this stuff works. This tutorial covers the hardware assembly and installation of all necessary software.
You should be familiar with Linux, but beginners can follow the steps with an occasional Google cross reference.
Unless you’re logged in as the root user you will need to prepend many of the commands with sudo, i.e. “sudo nano /etc/network/interfaces ” to temporarily grant yourself superuser privileges.
The Hardware Build
The parts list:
- Orange Pi One
- 2.5″ SSD
- Pressboard
- screws, PVC spacers, zip tie
Orange Pi One does not support USB 3. Read Disk I/O below for data transfer rates.
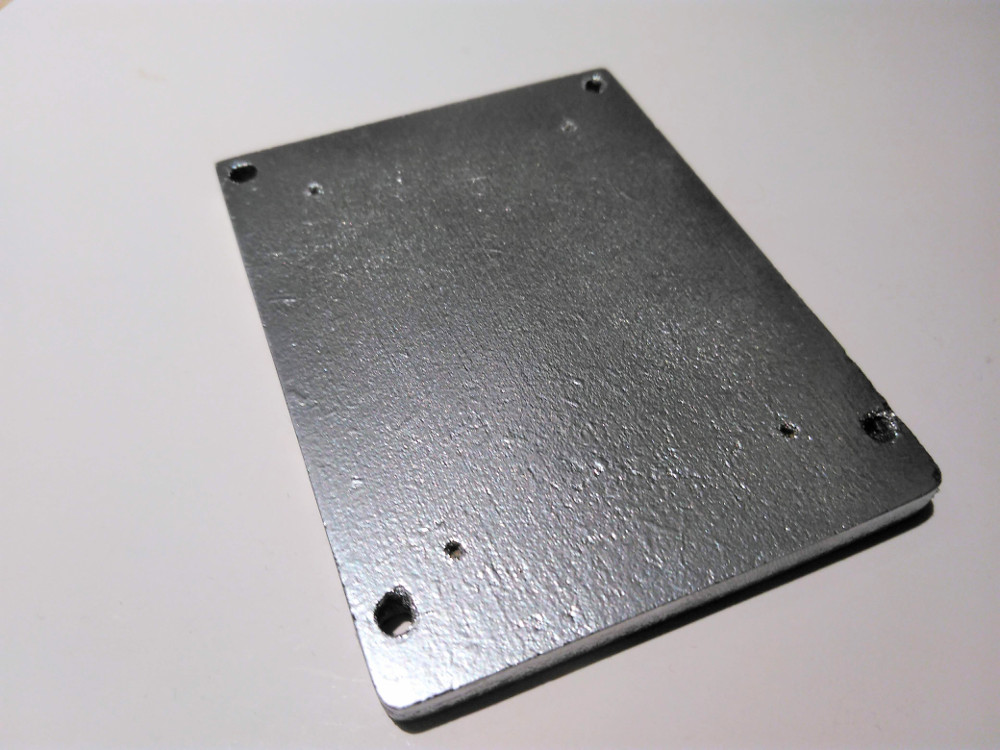
I gave up on using a premade Orange Pi One enclosure because they can not accommodate a 2.5″ SSD. Instead I cut a piece of pressboard to the SSD size, spray painted it chrome and mounted it on top of the SSD using #4 bolts.
The SSD mounting holes are spaced a bit wider than the holes on the Orange Pi One board. That’s why we need a mounting plate to mount Orange Pi One.
I used short PVC spacers to lift off the Orange Pi and screwed it into the pressboard.
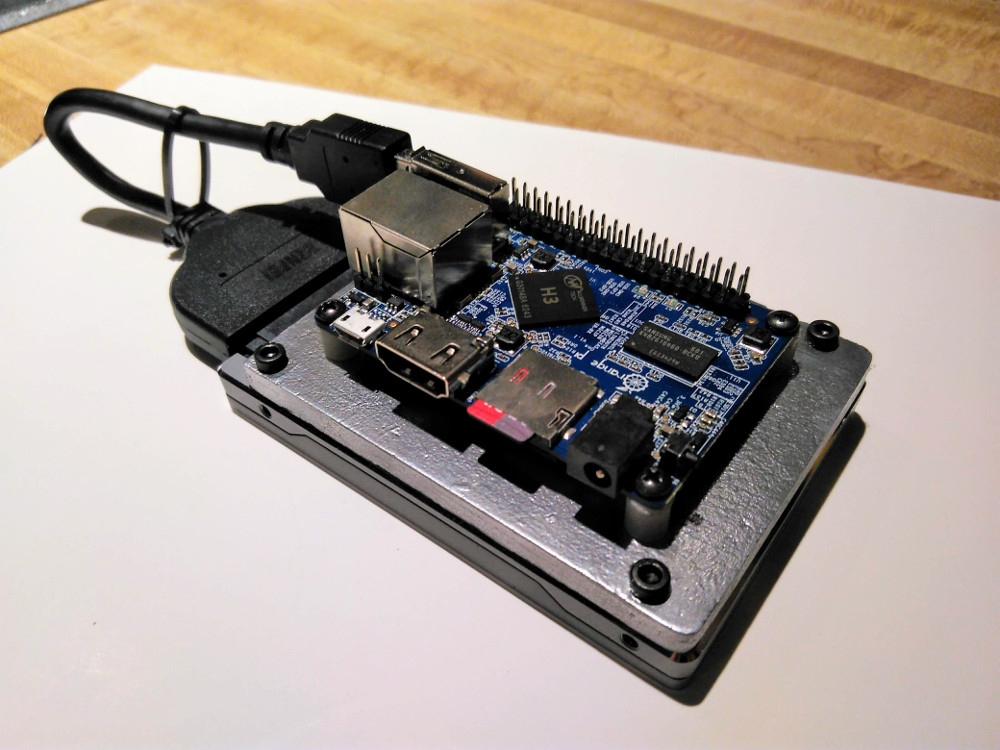
The USB to SATA cable loop was tugging on the USB connector. I pulled it tighter with a zip tie to relieve the stress on the connector. I will look for a better cable.
The Operating System
The OS is installed on a Micro SD card. I use Debian. I’ve had this computer for a while and don’t remember if I downloaded the OS image from the Orange Pi site or from the official Debian site.
However, I upgraded to Debian 9 Stretch using just the official Debian repo. Make sure to use the armhf architecture.
Connecting to the Orange Pi
You can connect the Orange Pi One HDMI output to a display and add a USB hub to connect a mouse and a keyboard. Instead I just ssh into the machine from another Linux box like:
ssh <myUserName>@<OrangeOneIP>
You can create a private/public RSA key pair on the client machine and push the public key to the Orange Pi to avoid being prompted for the password.
You can also connect from outside of your network if you setup port 22 forwarding in your router/firewall to send traffic to the IP address of the Orange Pi. If you do so, make sure your passwords are very strong.
You may experience thousands of brute force password crack attempts an hour. A good tool to reduce risk is Fail2ban which temporarily bans originating IPs after five failed login attempts. You can install Fail2ban with:
apt-get install fail2ban
Static IP
It’s very useful for a NAS to have a static IP address. Debian 9 is usually configured to use DHCP at install time.
To setup static IP address use a text editor like vi or nano:
nano /etc/network/interfaces
And add something like:
The actual IP addresses may be different in your case. Make sure to select an unused IP address for the Orange PI.
The new configuration will not take effect until you reboot or restart networking with:
systemctl restart networking
The Overclocking Issue
The original Orange Pi One shipped with some overclocking issue. Run the dmesg command to see if the log is flooded with something like this:
[ 16.876698] [ARISC WARING] :callback not install

[ 16.886241] [cpu_freq] ERR:set cpu frequency to 480MHz failed!
To mitigate the problem install:
apt-get install cpufrequtils
And edit the configuration:
nano /etc/init.d/cpufrequtils
to change:
governor="powersave"
This is not the most elegant solution. It will make your CPU run slower, but it will also runs cooler and the errors will go away.
Mounting the USB Drive
Your USB connected SATA drive will not automatically mount when connected. To mount manually you first need to find out the device name.
Connect the drive and execute dmesg. The device name will be printed towards the bottom of the log. Let’s say the drive device name is sda1 in our example.
Create a directory that will become the mountpoint and mount the drive:
mkdir ~/storage

mount /dev/sda1/ ~/storage
If you mount the drive with sudo then you need to change the ownership so your regular user can read and write:
chown -R <yourUserName>:<yourUserName> /home/<yourUserName>/storage
Auto Mount the USB Drive with Systemd
The drive will not mount at reboot unless you configure it in fstab (the old way) or systemd (Debian 8 or higher).
Make a little mount script in your home directory:
nano ~/storagemount.sh
Copy, paste, customize, save:
Then add a new service for systemd which will execute the above bash script at boot time:
nano /etc/systemd/system/storagemount.service
Copy, paste, customize, save:
Reload systemd and kick off your new service:
systemctl daemon-reload

systemctl enable storagemount.service

systemctl start storagemount.service
Customizations
Your system is now up and running and you can setup servers and services that will make it into a NAS.
Setup Samba
A NAS requires a Samba server so that Windows, MacOS, and Linux machines can connect to the network share. To install SMB use:
apt-get install samba
Open the Samba configuration file:
nano /etc/samba/smb.conf
Copy, paste, customize, save:
The “storage” directory is the mountpoint we had created earlier.
Add a Samba user:
smbpasswd -a <newUserName>
Restart the Samba server:
systemctl restart smbd
At this point the machines on your network should see the share and connect as newUserName you created.
Connecting to the share is specific to your client OS. In Windows you can right click “Computer” and select “Map Network Drive.” In the folder field type:
\\<OrangePI-IP-Address>\<yourShareName>
Atomated Backup
The beauty of building your own NAS is that you can add any type of service you need. I added a daily automated backup to an off-site server I own. You can also use Google Drive, Amazon S3 Bucket, or any other cloud storage
I have a ~/backup.sh script containing something like:
It uses the rsync command to do incremental backup of ~/storage to a remote server called someServer.com. The –delete option ensures that any files deleted on the NAS are also removed from the backup server.
We use systemd again to make a service out of this script and schedule it. You can also use cron to schedule.
Create a backup service:
nano /etc/systemd/system/backup.service
Copy, paste, customize, save:
Create a daily timer for the service:
nano /etc/systemd/system/backup.timer
Copy, paste, customize, save:
The 1 day period is specified in “OnUnitActiveSec=1d. ”
Reload systemd and kick off your new backup service:
systemctl daemon-reload

systemctl enable backup.timer

systemctl start backup.timer
To check all timers:
systemctl list-timers --all
Disk I/O
Orange Pi One has USB 2 on-board. The average write rates I clocked are:
33 MB/s for EXT4 formatted drive
17 MB/s for NTFS formatted drive
This same drive is able to hit 93 MB/s using USB 3 on another machine.
If you format your drive as EXT4 you will not be able to read it on MacOS/Windows without some extra EXT file system software. I’m primarily Linux based and EXT4 works just fine for me.
To test the speed, make a tmp folder on the drive and run dd:
mkdir ~/tmp

dd if=/dev/zero of=~/tmp/output.img bs=8k count=256k
Mounting The Computer
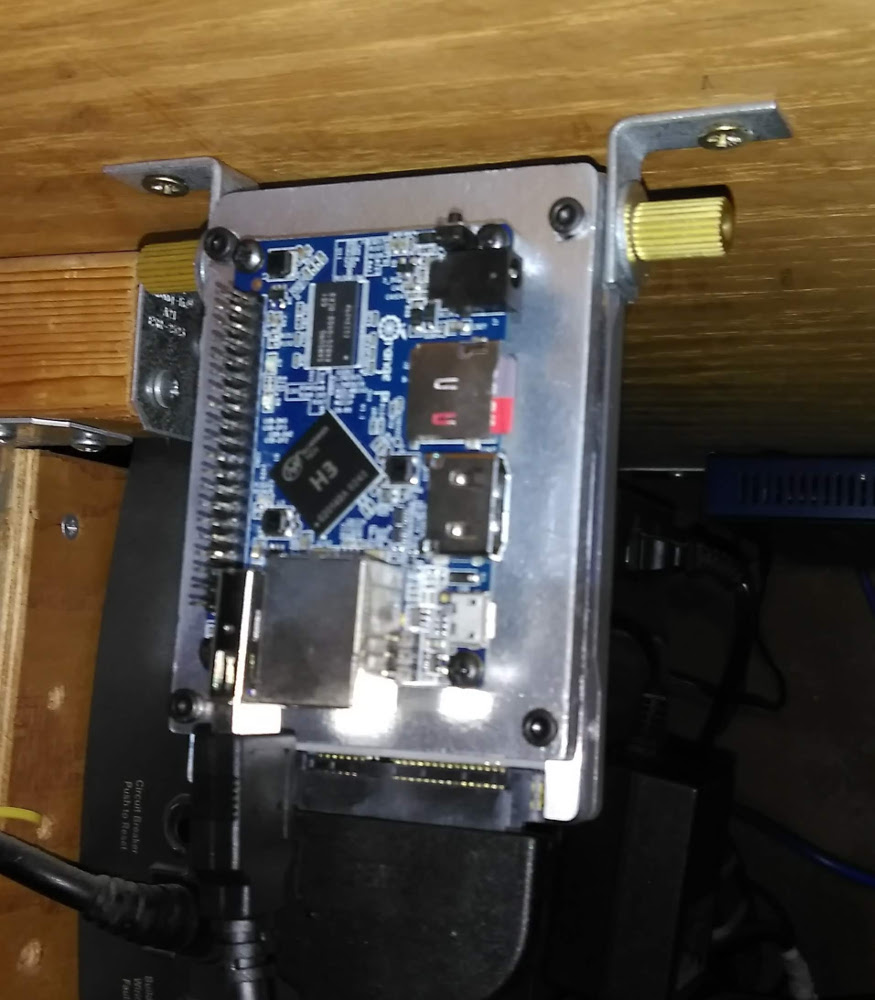
The SSD has standard mounting holes on the sides. I used small L brackets to mount the finished NAS to the underside of my desk.
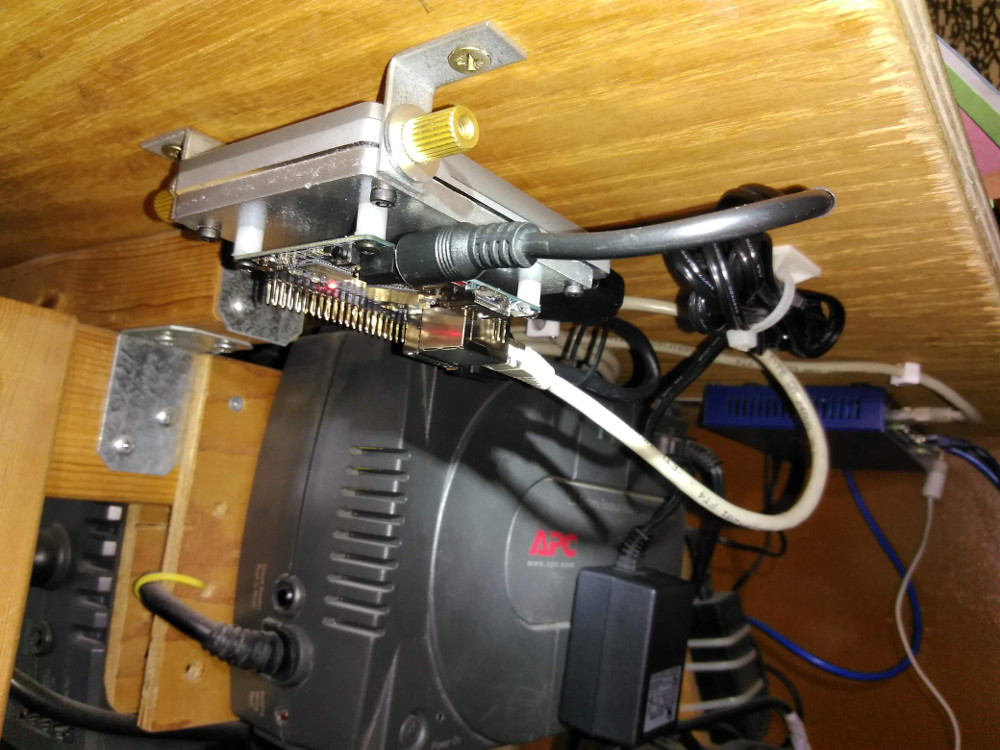
I used small thumbscrews to fasten the SSD to the L brackets. They allow me to easily lower the Orange Pi for a quick access to the pin headers.